Triton Inference Server란
Nvidia에서 만든 Triton Inference Server는 여러 프레임워크에 대한 모델들을 사용할 수 있고, cpu와 gpu의 처리량과 활용도를 극대화 해준다.
Triton Inference Server에서 모델을 ensemble을 하게 되면 "preprocess -> inference -> postprocess"를 캡슐화 하여 intermediate tensors를 전송하는 overhead를 피할 수 있고, triton으로 보내야 하는 request 횟수를 줄일 수 있다.
만약, ensemble을 하기 전에 기본적인 예제를 실행해보고 싶으면 밑의 링크를 보면 된다.
[Triton Inference Server] Docker를 사용한 triton server 예제 실행
Triton Inference Server란 Triton server는 DL의 model을 Inference하는데 GPU의 자원을 최적으로 할당하여 활용도를 극대화 하여 Inference server를 구축하기 편하게 해준다. 그리고 tensorflow, TensorRT, Caf..
shuka.tistory.com
Triton Inference Server model ensemble
triton server run
deep learning 모델에서 'preprocess, inference model, postprocess'의 단계에 대해 triton server에서 ensemble을 하기 위해서는 model path에 4가지 폴더를 생성해야 한다.
1. preprocess에 대한 folder
2. inference model에 대한 folder
3. postprocess에 대한 folder
4. 1 ~ 3을 묶을 ensemble 폴더
밑의 사진은 places365 모델에 대해서 ensemble을 테스트 하기 위해 만든 폴더들이고, 폴더 이름은 자신이 구별할 수 있는 폴더 명으로 해도 상관 없다.

각 폴더 내의 파일 및 폴더의 구성은 다음과 같이 되어 있다.
여기서 places_ensemble 폴더는 위의 classification_places, preprocess, postprocess를 하나로 묶은 model이라고 생각하면 되고, 나중에 client에서 model을 실행할 때 places_ensemble을 실행하면 된다.
config.pbtxt에서 name을 설정해줘야 하는데 여기서 name은 해당 모델 폴더의 이름과 같게 해줘야 한다.
- preprocess -config.pbtxt
- pre_input의 dim은 이미지마다 shape이 다르기 때문에 -1로 했다.
name: "preprocess"
backend: "python"
max_batch_size: 100
input [
	{
    	name: "pre_input"
 	   data_type: TYPE_FP32
 	   dims: [ -1 , -1, -1]
	}
]

output [
	{
 	   name: "pre_output"
 	   data_type: TYPE_FP32
 	   dims: [ 3, 256, 256 ]
	}
]

instance_group [{ kind: KIND_CPU }]
- classification_places - config.pbtxt
platform: "tensorrt_plan"
max_batch_size: 100
input [
  {
    name: "input_0"
    data_type: TYPE_FP32
    format: FORMAT_NCHW
    dims: [ 3, 256, 256 ]
  }
]
output [
  {
    name: "output_0"
    data_type: TYPE_FP32
    dims: [365]
  }
]
dynamic_batching { }
- postprocess - config.pbtxt
- output에서 dim은 원하는 return 방식을 model.py에서 해준 후 맞춰주면 된다.
name: "postprocess"
backend: "python"
max_batch_size: 100
input [
  {
    name: "post_input"
    data_type: TYPE_FP32
    dims: [ 365 ]
  }
]

output [
  {
    name: "post_output"
    data_type: TYPE_FP32
    dims: [ -1 ]
  }
]

instance_group [{ kind: KIND_CPU }]
- places_ensemble - config.pbtxt
name: "places_ensemble"
platform: "ensemble"
max_batch_size: 100

input [
  {
    name: "INPUT"
    data_type: TYPE_FP32
    dims: [ -1 , -1, -1]
  }
]

output [
  {
    name: "postprocess_result"
    data_type: TYPE_FP32
    dims: [ -1 ]
  }
]

ensemble_scheduling {
  step [

    {
      model_name: "preprocess"
      model_version: -1
      input_map {
        key: "pre_input"
        value: "INPUT"
      }
      output_map {
        key: "pre_output"
        value: "preprocessed_image"
      }
    },

    {
      model_name: "classification_places"
      model_version: -1
      input_map {
        key: "input_0"
        value: "preprocessed_image"
      }
      output_map {
        key: "output_0"
        value: "classification_result"
      }
    },

    {
      model_name: "postprocess"
      model_version: -1
      input_map {
        key: "post_input"
        value: "classification_result"
      }
      output_map {
        key: "post_output"
        value: "postprocess_result"
      }
    }
  ]
}
위의 python_backend git에서 model.py를 보면 requests를 for문하는 부분이 있는데 각 모델의 config.pbtxt에서 설정했던 input, output의 name을 맞춰서 변경해 주고 전/후 처리 코드를 작성하면 된다.
- model.py
        # and create a pb_utils.InferenceResponse for each of them.
        for request in requests:
            # Get INPUT0
            in_0 = pb_utils.get_input_tensor_by_name(request, "INPUT_0")
            img = in_0.as_numpy()

            <처리할 코드 작성 부분>

            out_tensor_0 = pb_utils.Tensor("OUTPUT_0",
                                           img_out.astype(output0_dtype))

            inference_response = pb_utils.InferenceResponse(
                output_tensors=[out_tensor_0])
            responses.append(inference_response)

        return responses
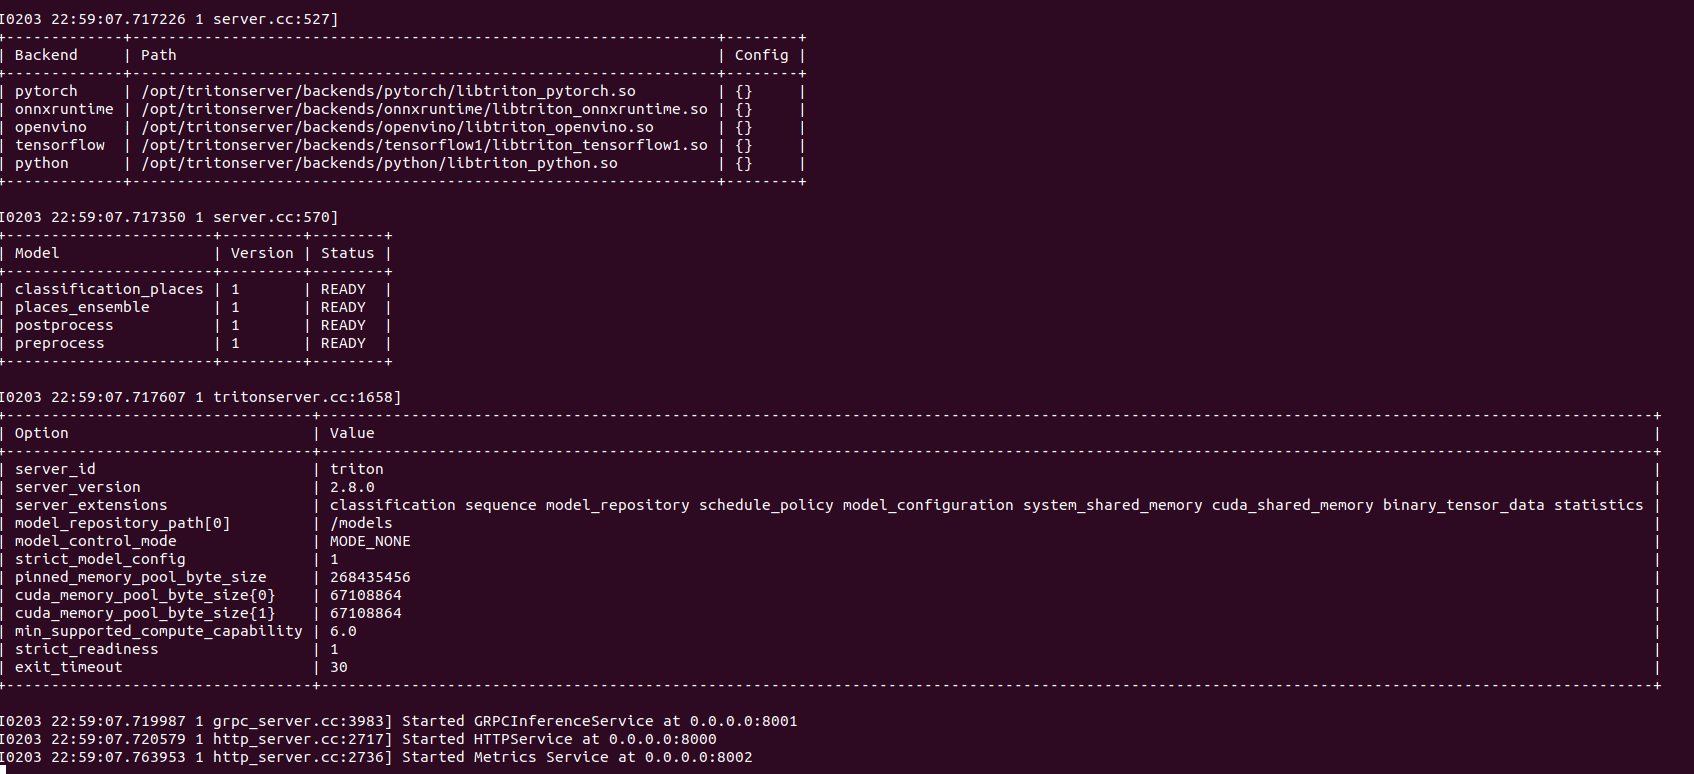
config와 model.py를 수정을 완료하면 밑의 이미지와 같이 model status가 ready로 되면서 server 작업이 완료된다.
model test - client.py
model이 정상적으로 load되서 server run 상태가 되면 python_backend 예제에 있는 client.py를 수정해 주고 test를 해보면 된다.
이때 client.py에서 input_name과 output_name을 설정해 줘야 하는 ensemble에서 작성하였던 config.pbtxt에서 input과 output의 이름으로 맞춰서 변경해 주면 된다.


댓글